Ooooohhhhh! Don't you just love trying new things and adding interesting elements to your projects?
With all of the lovely flowers in bloom, here is a fun project for you to start on now...
And finish months, or even a year later...
Guilt free!
So, grab a pretty basket, some scissors, and garden gloves and seek out some flowers for clipping! (I do not recommend clipping your neighbor's flowers). If this step jut cannot happen for you, or doesn't appeal to you at all... Just drop by a grocery store or florist, and purchase a small bouquet.
You may wish to enjoy your flowers for awhile, in a vase, or, you can hang them upside down using a rubber band, clothes pins, yarn, and allow some drying time. Just don't allow your flowers to become too dry and brittle. I took my flowers directly from the vase once I noticed that some of them were dropping petals. I did not want to risk losing the vivid colors.
I placed my flowers into a flower press.
Now, I realize that not everyone has a flower press just sitting around. You don't really need one. Simply lay your flowers on a paper towel or chipboard, add another paper towel or chipboard on top. ( I recommend the chipboard. If using paper towels, you may want to double up).
Next, sandwich your drying flowers in a big pile of heavy books. (Books, flowers, more books on top).
Walk away for 6 months to a year! ( honestly, I cannot tell you when your flowers will be dry because I completely forgot about mine... Until a year later)!
When I did remember them...
They were fabulous!!!!
Paul had given me this bright, cheery bouquet and I so wanted to keep a few of the flowers!
I decided that the perfect place for these flowers would be in my art journal.
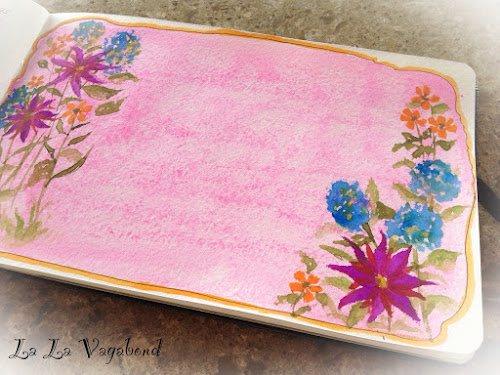
So, I jazzed it up a bit by painting some quick watercolor flowers onto a page.
To adhere and seal the flowers onto the art journal page, I used this wonderful product from Golden.
I apply it with a paintbrush, first onto the page itself. I lay down the flowers and then applied a top coat of gel medium.
As I was doing this, MORE ideas came into my already cluttered mind!
Pressed flowers in picture frames, on wedding album covers...
Flowers on wooden plaques and given as gifts!!!! Hmmmm. How about putting pressed flowers on porcelain objects such as vases or those premade Christmas ornament blanks? I get so excited just thinking about it!!!! Oh, the possibilities!
For now, I am quite happy with the results in my art journal...
The gel will dry clear.
Once it has completely dried, I will add some words either with acrylic paint or a Sharpie pen.
I hope that you too, will enjoy pressing flowers and coming up with blooming projects of your own!
Have fun!
Until next time...
XO


Missy, I love your creative mind! June
ReplyDeletebeauty-full!:-)
ReplyDeletethanks for letting us see:-)
rebekah:-)
Aw, Thank you, Rebekah! (What a lovely name & spelling)! I appreciate you dropping by!!!!! XO
DeleteThank you for sharing, your Artwork is beautiful,creative and inspiring.
ReplyDeleteBest Regards
Anna Marie
Thank you for sharing, your Artwork is beautiful,creative and inspiring.
ReplyDeleteBest Regards
Anna Marie
Thank you, Anna Marie!!!! I so appreciate you dropping by! I'm glad that you found some inspiration! XO
Delete